General information
Read and keep this user manual!
The instruction manual is for the STING 110A canvas stretching machine. The manual contains important information on the safe use of the device. Therefore, read the instruction manual carefully before using the machine! Pay attention to the safety instructions and warnings! Failure to follow the instructions in the instruction manual may result in injury. Keep the safety instructions in a safe place. All users of the machine must be informed of these instructions and warnings. If you sell the machine later, be sure to include this instruction manual with it!
Intended use
The machine is designed to be suitable for stretching canvas pictures on a wedge frame according to the instructions for use. Improper use may lead to the risk of accidents. The manufacturer assumes no liability for accidents or injuries resulting from improper use.
Legend: You will find various warning signs and symbols in the user manual. These signs are also marked on the machine and serve to draw your attention to the fact that if the machine is used in a manner not specified, injuries may occur to the person operating the machine!

Products bearing the mark shown here comply with all relevant Community regulations of the European Union.

During operation of the machine, the operator is exposed to continuous noise exposure, primarily due to the stapler, therefore the use of hearing protection is recommended to prevent hearing damage.

Wear eye protection to prevent possible eye injurieswhen using the stapler
Instruction manual
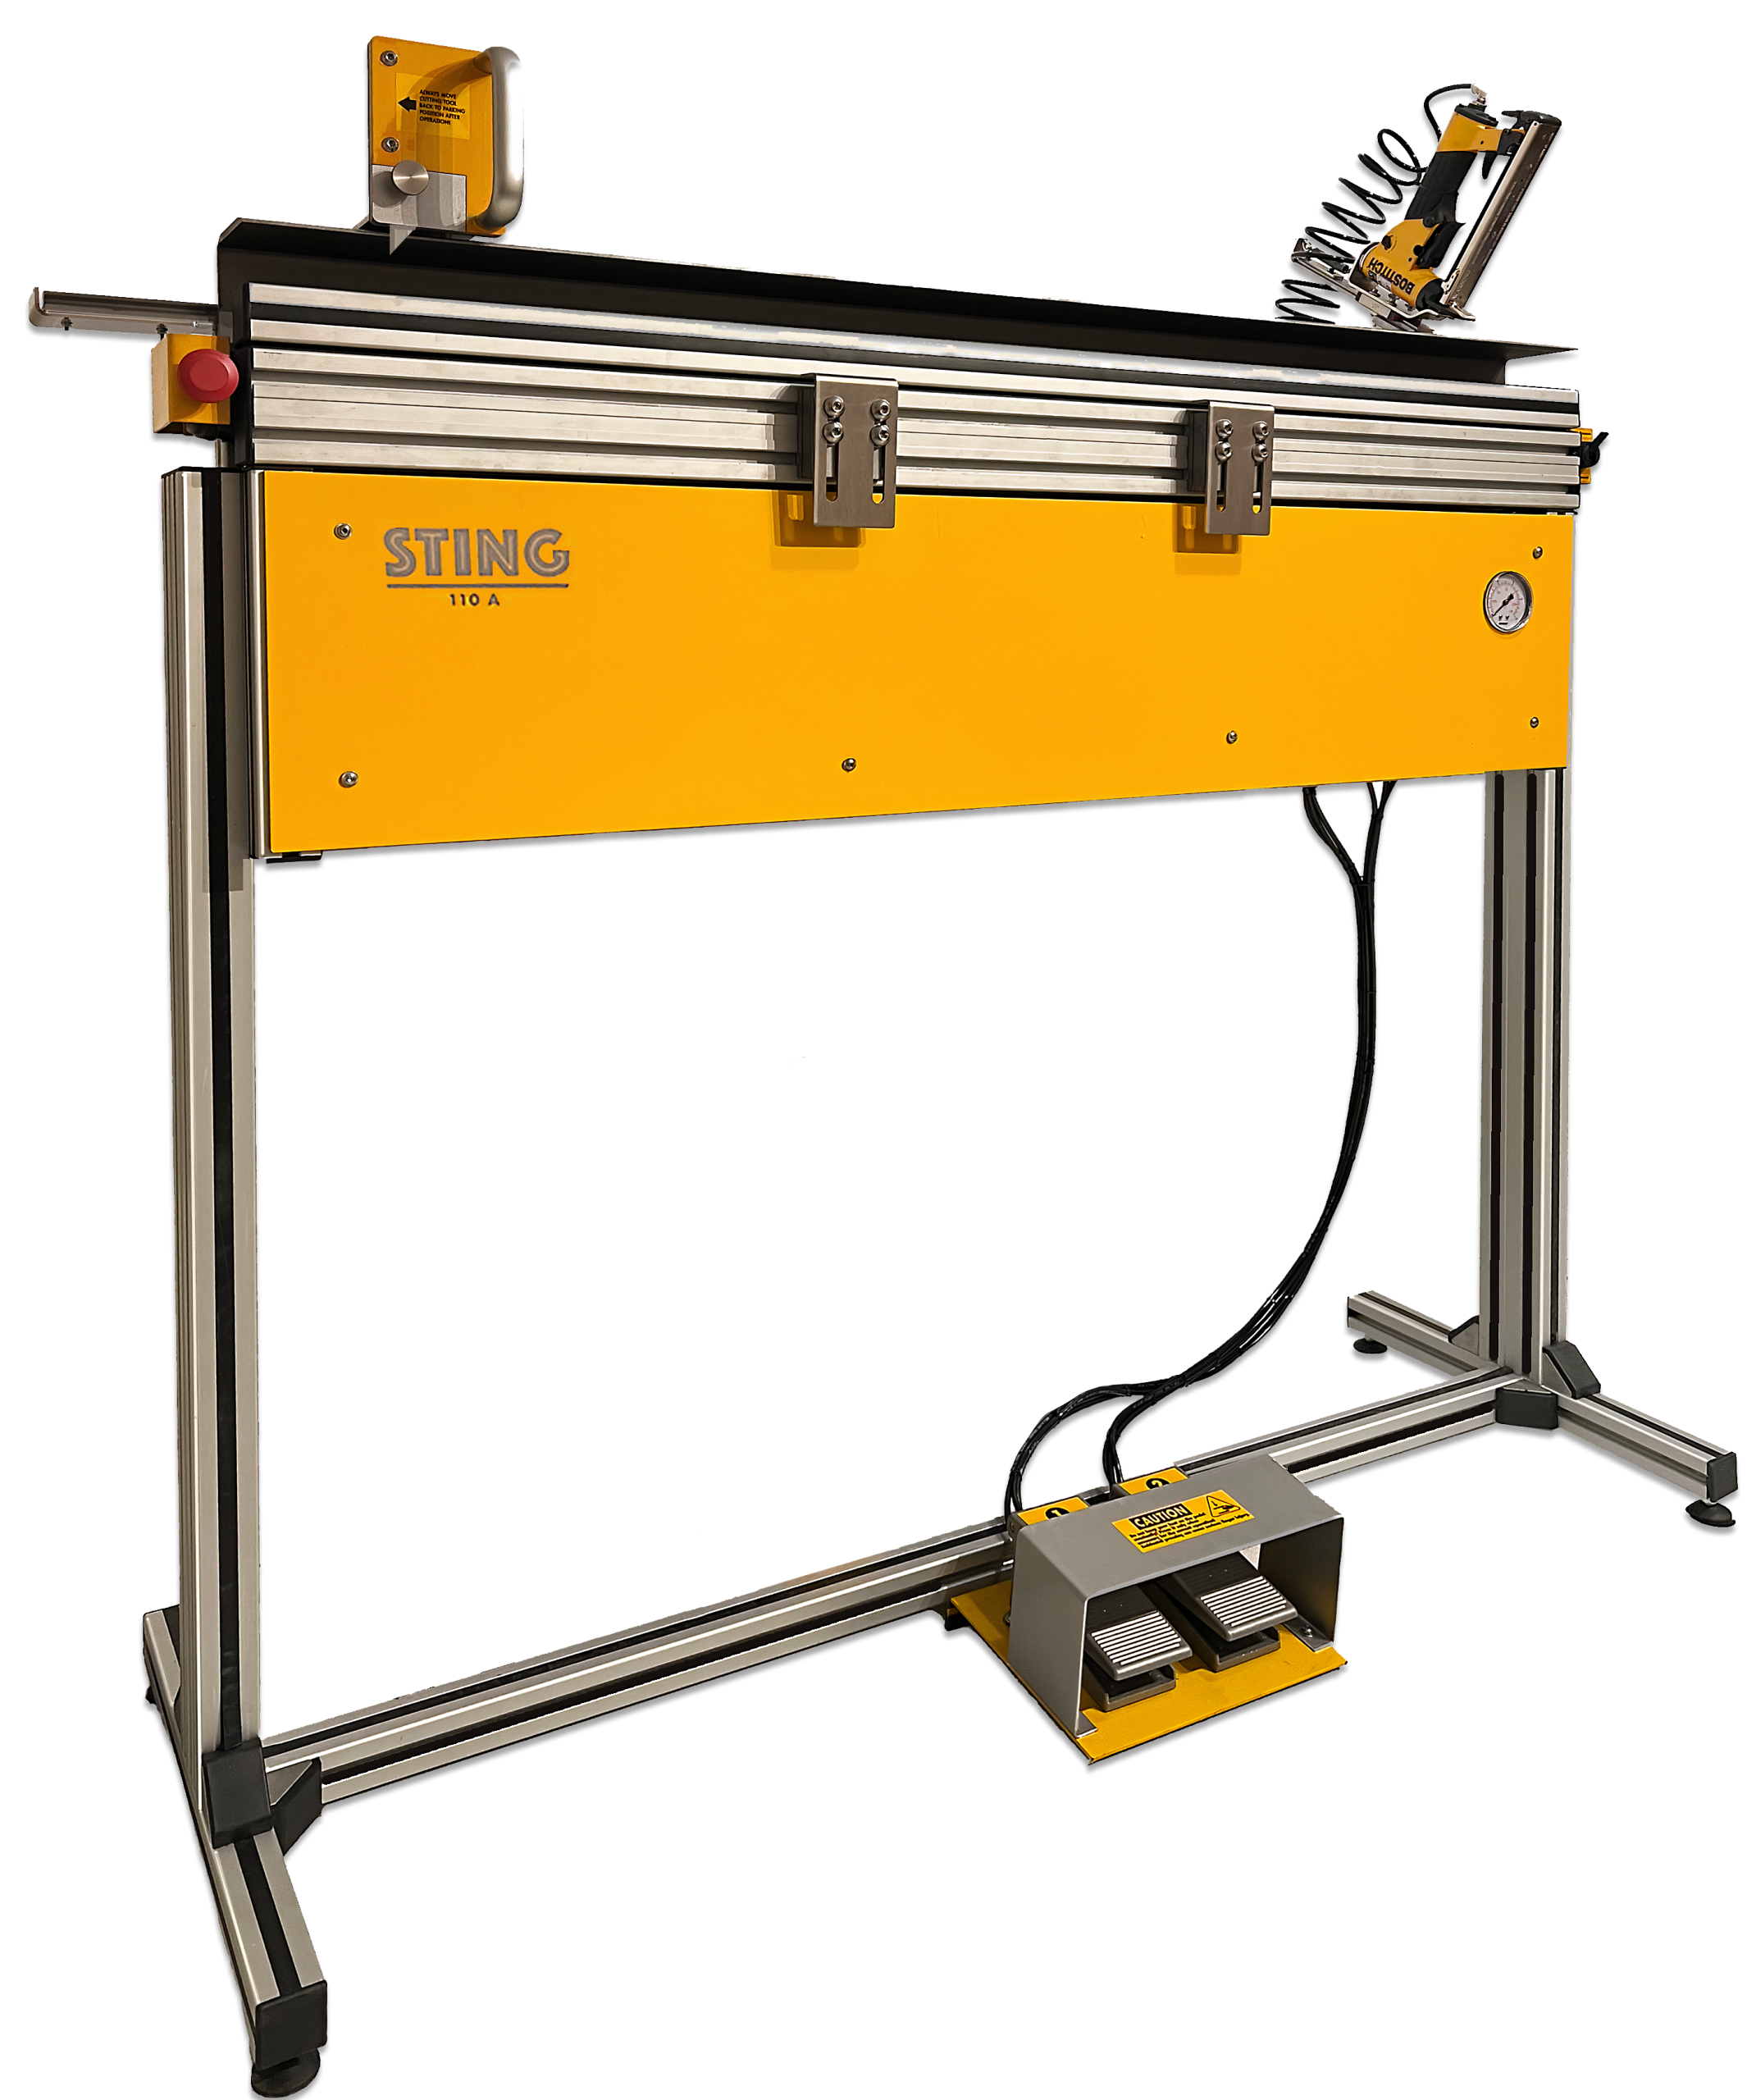
110 A
Canvas stretching machine
Manufactured and distributed by: Interneon Ltd. 1182
Budapest, Üllői út 691.
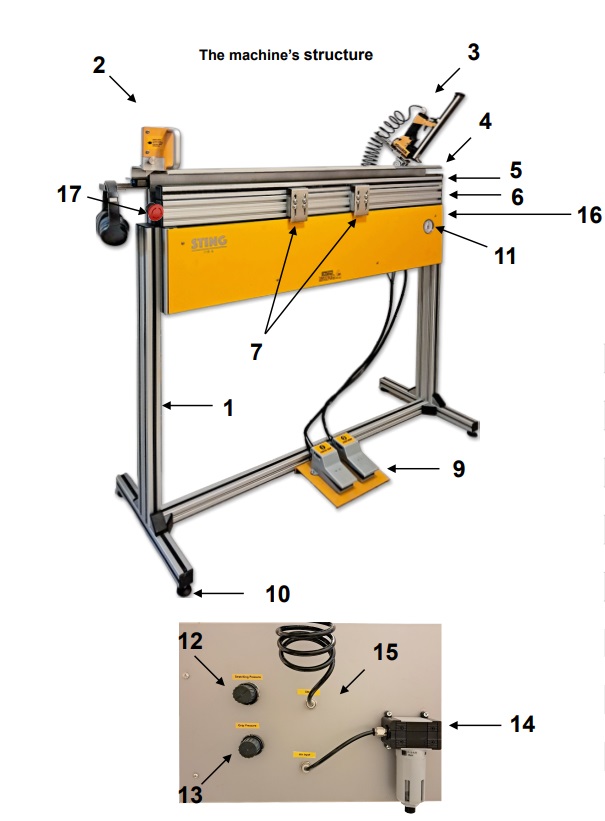

| 1 Frame structure |
| 2 Cutting tool |
| 3 Stapler |
| 4 Top stop |
| 5 Clamping bar |
| 6 Tenser |
| 7 Frame holder buck |
| 8 Pedal 1. |
| 9 Pedal 2. |
| 10 Adjustable leg |
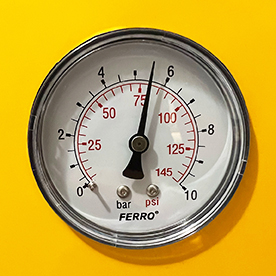
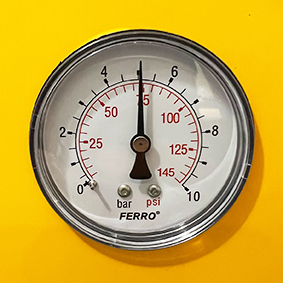
| 11 Manometer |
| 12 Tension force regulator |
| 13 Clamping force regulator |
| 14 Air filter |
| 15 Stapler connector |
| 16 Pressure switch |
| 17 Emergency stop |
Technical data:
| Pressure value | 5,5 – 6 Bar |
| Max operating width | 110 cm |
| Weight | 72 kg |
| Noise level under load | 65 dB |
Dimensions:
| Width | 150 cm |
| Height | 120 cm |
| Depth | 46 cm |
Superstructures:
Bostitch stapler
| Operating pressure value | 4,9 – 8,4 Bar |
| Clamp magazine capacity | 150 db |
| Noise level under load | 64,4 dB |
| Air consumption | 0,17 L/ belövés |
Cutting tool
| Manual control on linear railv |
| Magnetic blade holder with clamping screw |
| Recommended blade: Stanley Fatmax trapéz |
INSTRUCTION MANUAL
1. Place a stretcher bar that you usually use on the
tensioning brackets. Adjust the height of the brackets so that the
upper edge of the stretcher bar is 10 – 12 mm higher than the top of
the upper stop of the machine, then secure the brackets (7) with the
screws

2. Set the pressure switch (16) to the upper position (which allows you
to adjust the degree of canvas clamping) and use the associated
pressure regulator (12) to set the incoming air pressure to 5.5 bar. At
this pressure value, a secure clamping of the clamped canvas edges
can be achieved.
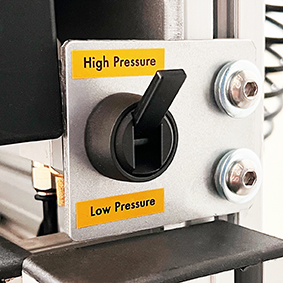
3. Place the pressure switch (16) in the lower position (which allows
you to control the amount of tension) and set the pressure to 5 bar using the associated pressure regulator (13).
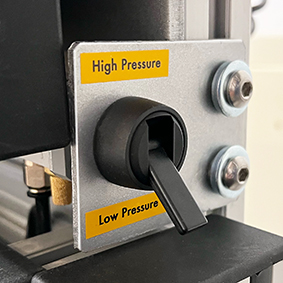
Why are the two different pressure values necessary? When the machine tensioning operation begins, one edge of the image to be stretched is already manually pre-fixed. This allows the canvas to be stretched with a higher pressure value, as it has adequate resistance. So the pressure switch is in the upper position at this time. In the next tensioning step, the upper position is also used when clamping the canvas, but for tensioning we switch to the lower, low pressure position, since the opposite side of the image is not fixed, so if excessive tensioning force is applied, the image may be distorted. During the last tensioning operation, the upper switch position is used again, since by this time the canvas is also fixed on the opposite side.
4. Set the sliding tensioning brackets symmetrically to the center,
depending on the internal dimensions of the frame, preferably
towards the inner edges of the frame, then place the assembled
wedge frame on the brackets so that the end of the canvas already
fixed on one side falls at the bottom.
5. Insert the top edge of the canvas into the gap between the clamp
and the top stop and press pedal #1.
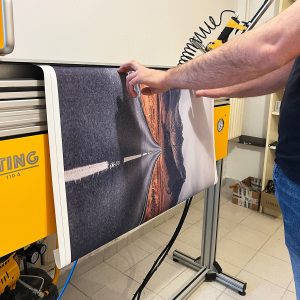
6. Press pedal No. 2 to stretch the canvas. Let the lower part
of the frame rise about 6-8 cm from the vertical plane.
7. Force the raised lower frame section into a vertical position.
8. Pull the stapler from the right parking position to the edge of
the canvas and staple the entire surface. Then pull the stapler
back to the original, parking position!

9. Press pedal no. 2 to release the tension function.
(Important: Do not press pedal no. 1 to maintain the grip on
the canvas during cutting)!
10. From the left parking position, pull the cutting tool along
and cut off the excess edge of the canvas, then pull the cutting
tool back to its original position.
11. Finally, press pedal No. 1 and remove the finished image
and the cut piece of canvas from the machine
The above sequence of operations can also be seen in the video on https://interneon.hu/vaszonkep-feszito-gep/!
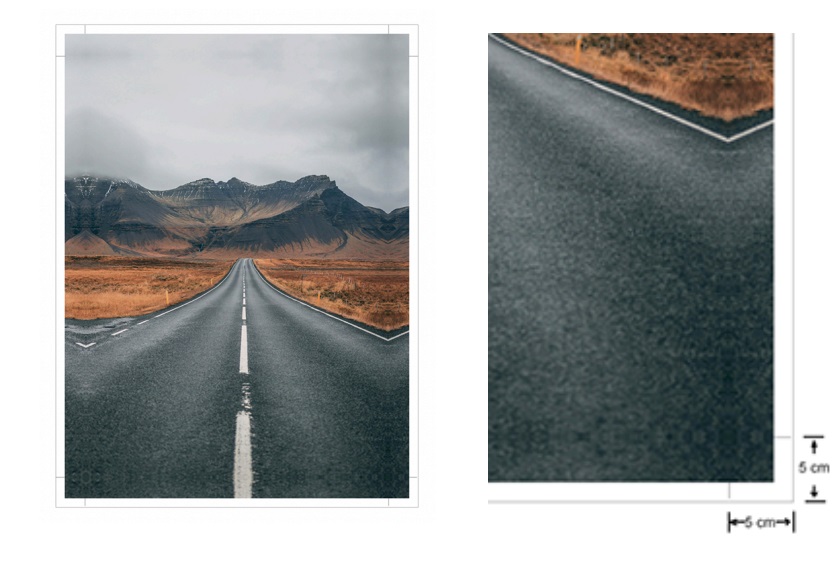
Fixing the first side of the canvas to be stretched:
Place the printed image on the working bench (printed side down) and use the cutting marks to align the wedge frame placed on it to the desired position. If the canvas to be stretched is not square, choose one of the longer sides to fix! Fold the edge of the canvas back onto the frame
and secure it with a stapler. Precise positioning is important, as it affects the final, symmetrical position of the image.
An “EasyStart” tool is also available (optional), which makes this operation faster, more accurate and easier!
Preparation and printing of images for stretching.
The image to be stretched on a wedge frame must be printed in such a way that it can be precisely fitted to the frame and the bleed section must be wide enough for the stretching machine to securely grip and clamp it.
Accident risks arising when operating
the machine
The machine has been designed so that when used as
intended, there is no risk of accident to the user. When working
on the machine, the operator is exposed to noise, primarily due
to the stapling machine mounted on it. If used continuously, this
noise can even cause hearing damage. Therefore, it is
important to use hearing protection while working. Such
devices are also commercially available, but the manufacturer
also includes ear protectors with the machine. The headphones
we provide, in addition to their natural sound insulation effect,
minimize external noise with the built-in electronic noise
reduction. It can be connected to a phone via Bluetooth and the
machine operator can maintain communication while working
with the built-in microphones.
Although the probability is extremely low, – if the stapling machine
is used improperly – staples fired from it can cause injury, so it
must be handled with due care. To avoid possible eye
injuries, wear eye protection while working! Therefore, we
include a pair of adjustable-arm safety glasses with every
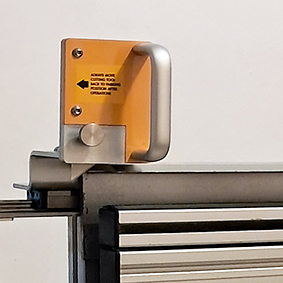
machine we sell. We place the following warning label on every
machine to remind you to use the above protective equipment:

When starting the tensioning, insert the upper edge of the canvas print
into the opening between the clamp and the upper stop. To perform this
operation, it is not necessary to insert your fingers into the opening (see
video). However, for safety reasons, the upward movement of the
clamping bar is slowed down to avoid pinching your fingers.
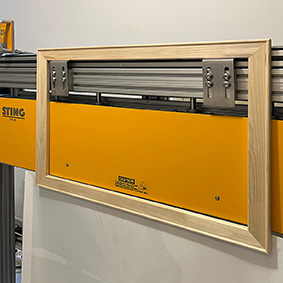
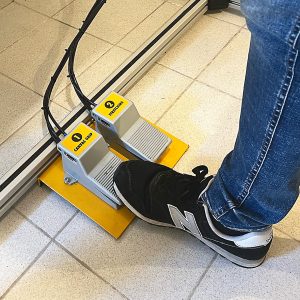
Accidental pressing of foot pedal no. 1 can activate the clamping
function. The clamping bar moves upwards and if the operator’s
finger is accidentally in the opening, it can be pinched and cause
finger injuries. To prevent this, never keep your foot on or above the
pedal continuously and the machine is equipped with pedal protection cover as well. Only step on the pedals if you consciously want to operate
the canvas clamping function!
Therefore, we place the following warning label on all machines:

Maintenance and cleaning
The machine does not require any special maintenance, except for
occasional inspection of the fasteners (screws). Although we use
auxiliary materials during production to secure the screws, which
significantly reduce the possibility of loosening the connection, in the
event of prolonged continuous use, retightening may be necessary. Use
the wrench set provided for this!
For cleaning, use a dry, soft cloth; never use gasoline, solvents or
cleaning agents!
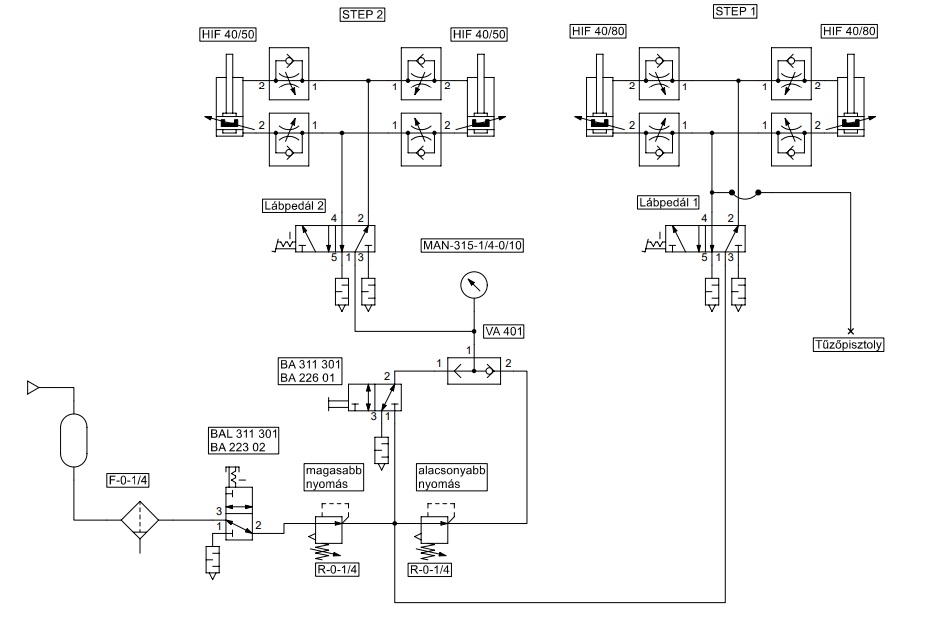
Connection diagram
(pneumatics):